Register for Smart Binance Pro

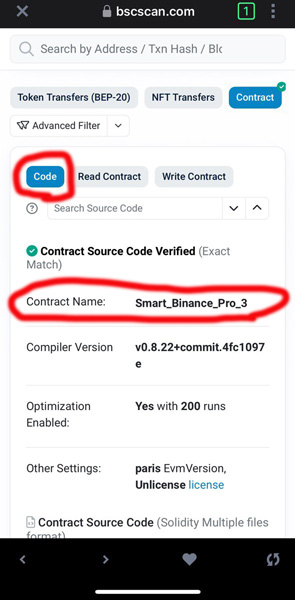
For someone who is registering for Smart Binance Pro for the first time, the steps may seem a bit difficult.

Of course, our suggestion is that it is better to seek help from one of the project promoters for the first time so that after the necessary training, you can easily register for others or yourself.

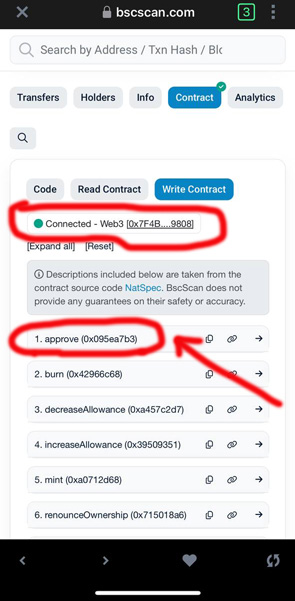
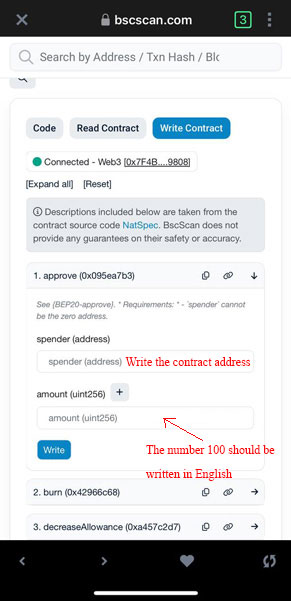
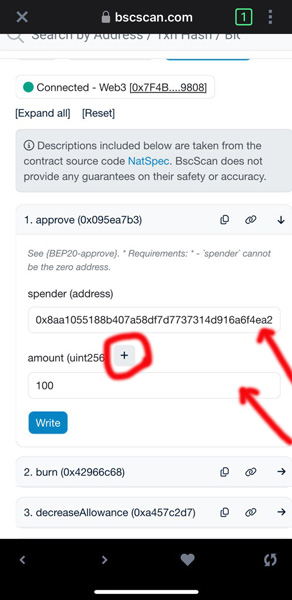
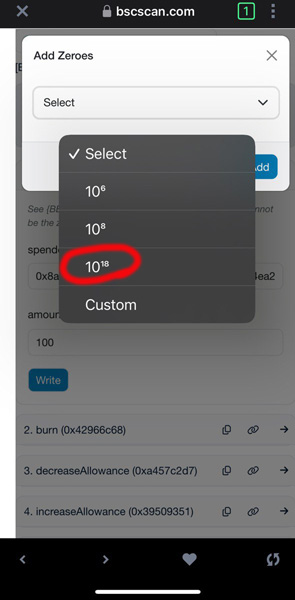
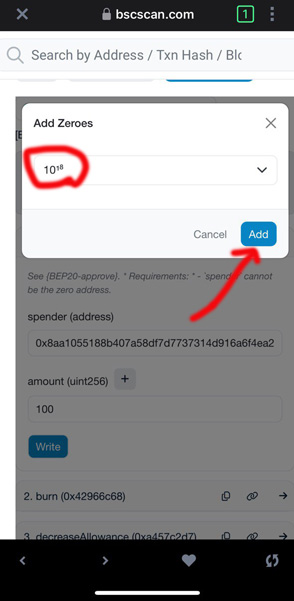
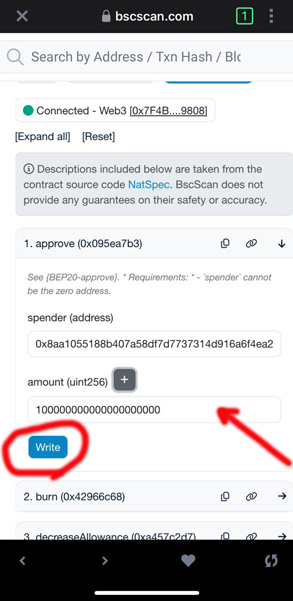
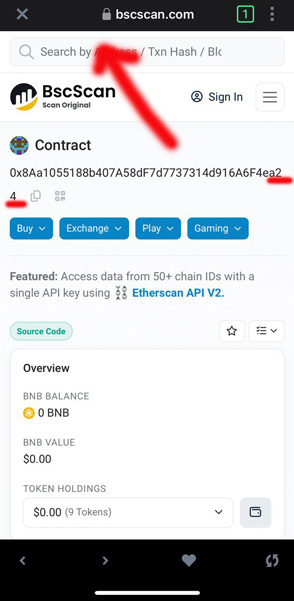
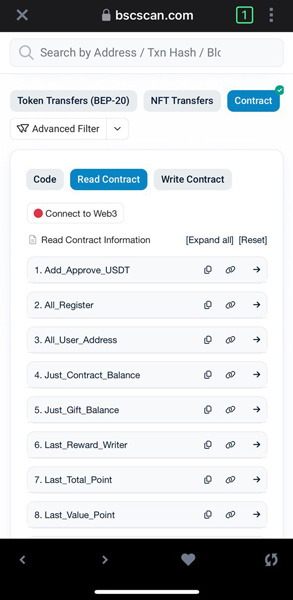
We hope that we can help you with this by explaining and including photos of the different parts.
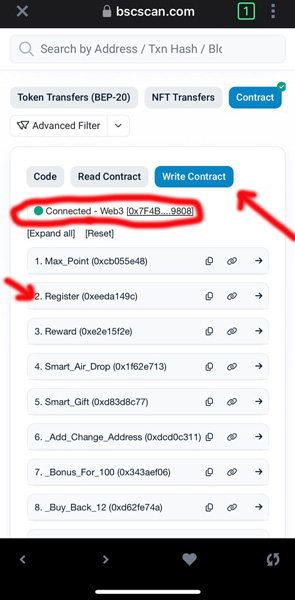
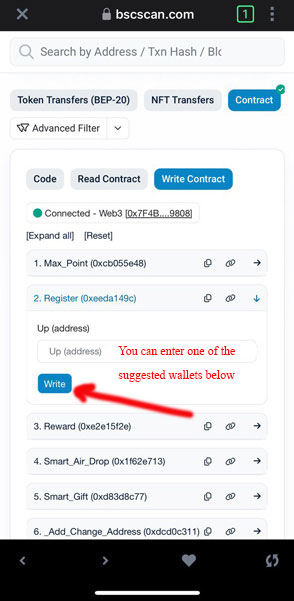
Registration steps:

  • First, you need to create a digital wallet for yourself, which we recommend is Trust Wallet. If you don’t have a digital wallet yet or don’t know how to create one, refer to the tutorial on creating a Trust Wallet.
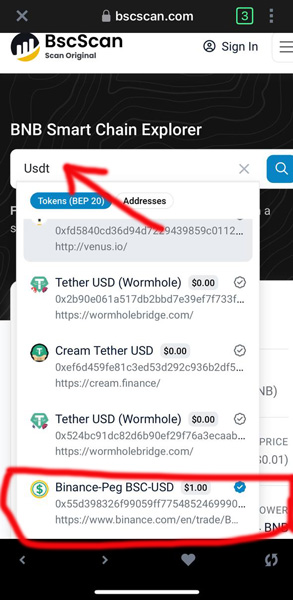
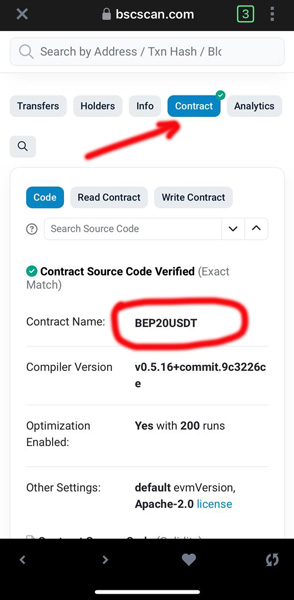
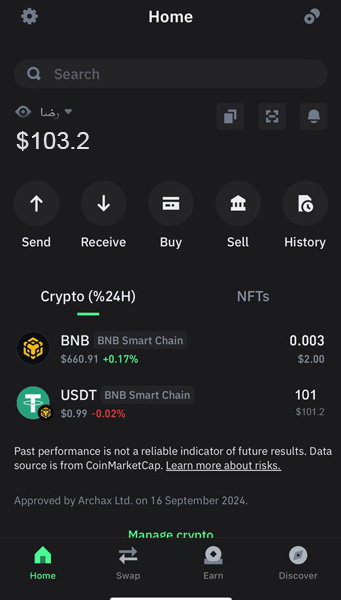
  • First, you need to have $101 Binance-based Tether (USDT -BEP20) in your wallet.
  • Because the currency you pay and the commission you receive are processed on the Binance blockchain, it is better to have about $2 of Binance Smart Chain currency in your wallet. Like the picture below.
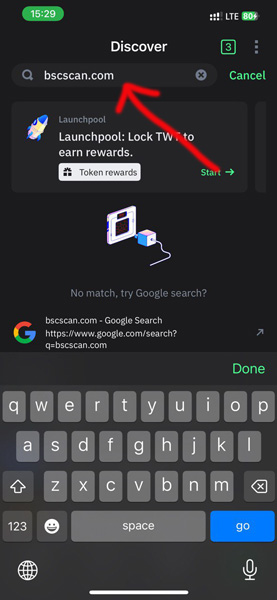
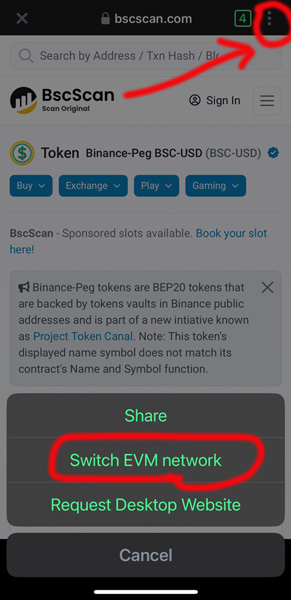
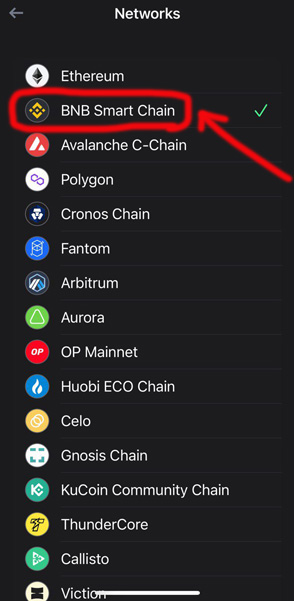
  • As you must have noticed by now, this project is on Binance, so to register we need to log in to the Binance blockchain.
  • So click on the “Discover” option in your Trust Wallet.
  • And type the phrase “bscscan.com” in the blank space at the top of the page, as shown in the image below.
  • Now you are logged into the Binance blockchain. As shown in the figure below, click on the three dots at the top of the screen to open the following menu.
  • Then, in the menu that opens, click on the “Switch EVM network” option.
  • And in the list that opens, as shown in the image below, we select “BNB Smart Chain”.
  • Now it’s time to declare your readiness to register for the Binance smart contract, so in the empty search space at the top of the page, we write the phrase “USDT”, which is the symbol for the digital currency Tether. Be careful not to press any button after writing it, as the drop-down menu will open as shown below.
  • We lower the drop-down menu until we reach “Binance-Peg BSC-USD” with a dollar sign in front of it, as shown in the figure above, and click on it.
  • We scroll down the opened page to reach the Contract section.
  • As you can see in the image below, the name of this contract is “BEP20USDT”.
  • It’s time to enter the contract, so in the “Contract” section, click on “Write Contract”.
  • As you can see, the “Connect to Web3” section is red, which means your wallet is not connected to the blockchain.
  • So to connect your wallet to the Binance network, click on “Connect to Web3”
  • You will be given a warning to ensure connection to the blockchain, click “OK” as shown below.
  • Click on “MetaMask” in the menu that opens, as shown below.
  • Even though you click on the MetaMask wallet, your TrustWallet wallet will actually be connected to the blockchain.
  • After connecting your wallet to the blockchain, its red button will turn green, as shown in the image below.
  • After connecting, click on option number 1, “approve”, as shown below.
  • In the opened section number 1, as shown in the figure below, you must write the address of the Smart Binance Pro smart contract in the “Spender” field.
  • In the “amount” field, type the number 100, making sure to use English letters to type the numbers.
  • To avoid typing errors in the contract address, we have included it below for you to copy.

0x8aa1055188b407a58df7d7737314d916a6f4ea24

  • The programming in this smart contract is such that commissions are calculated up to 18 decimal places and then paid. For this reason, it must be taken into account when registering. So after copying the contract address in its place and writing the number 100 in the second place, as in the image below, we click on the plus sign (+) above the number 100.
  • And in the small window that opens, click on the arrow opposite “Select” as shown in the image below to open it.
  • As shown in the figure below, in the drop-down menu that opens, we click on the number 10 to the power of 18, which means that our entered number will be calculated up to 18 decimal places.
  • After selecting the appropriate number, click on the “Add” button as shown in the image below.
  • As you can see, after adding those 18 digits, there will be another 18 zeros in front of 100 in the “amount” section.
  • By clicking the “Write” button, you will be asked several times whether you are sure you want to connect to the Binance blockchain and you just click “Ok” at each step.
  • After completing all these steps correctly, $100 will be deducted from your Tether wallet.
  • The only thing left is to enter into a contract and link our account to an account.
  • For this purpose, we need to copy the Binance Pro smart contract address that we provided above and place it at the top of the Binance blockchain page as shown in the image below.
  • After pasting the contract address into the Binance blockchain, please note that the last three digits of the contract address are “a24”
  • After checking the address and making sure it is correct, scroll down the page to reach the contract section as shown in the image below.
  • To make sure you are on the correct contract, you can click on the “Code” button. If it is correct, the name smart Binance Pro 3 should appear in the contract name field, as shown in the image below.
  • Click on “Write Contract” as shown in the image below.
  • Now you need to connect your wallet, so let’s do a quick review of connecting your wallet to the contract to remind you if you forgot any part.
  1. Click on the three dots above the keyboard and select “Switch EVM network” and then select “BNB Smart Chain”
  2. Click on “Connect to web3” and click “Ok” in the message that appears and click on “MetaMask” to connect your wallet until its light turns green.
  • After connecting, click on option 2, “Register,” to open it.
  • In the window that opens, in the “Up” section, you need to enter the Tether wallet address of the person you want to connect to.
  • You should note that to connect each wallet to this project, you must have a reference. This means that friends who want to register with three positions, for example, must use a reference code to register the first position, but for the two accounts under your control, you will use the Tether code of your first position so that the two lower positions are connected to your first and top position.
  • If you have become familiar with the Smart Binance Pro project through the site and do not have anyone to introduce you to, below I will provide you with some addresses of new friends so that you can register by copying and pasting them into the “Register” section.
  • By clicking the “Write” button, you will be asked to confirm the connection. By clicking the “Ok” button, your registration is actually completed.

Some suggested addresses for newcomers

0xDfF3eC12321C9bf3e0E025E9f6446F093c5de0f3

0x053cB7a429A762C0734Ab727eb4E99A0724Cd7fd

0x78564051E1aEBBfe18Df969b16eEFfd2Fc52d121

0x56FA31185a30F8B9d71D4A9D0C9ba2F36646357a

0xc4B5DDBFE0ec3D8c1ec1113FdB2af377afD04cce

Congratulations, you have registered.